
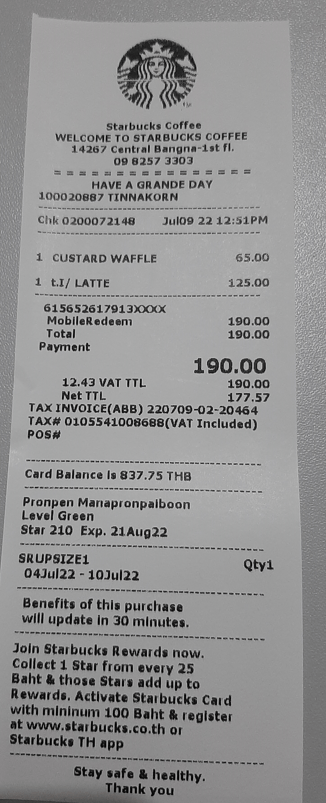
In this article, I’ll create a custom prompt to extract data from a receipt and record to Excel.
Go to Power Automate, click on ‘AI prompts’, and select the ‘Build your own prompt’ card

Click ‘Input’ tab on the right-hand side, and then press the ‘Add input’ button
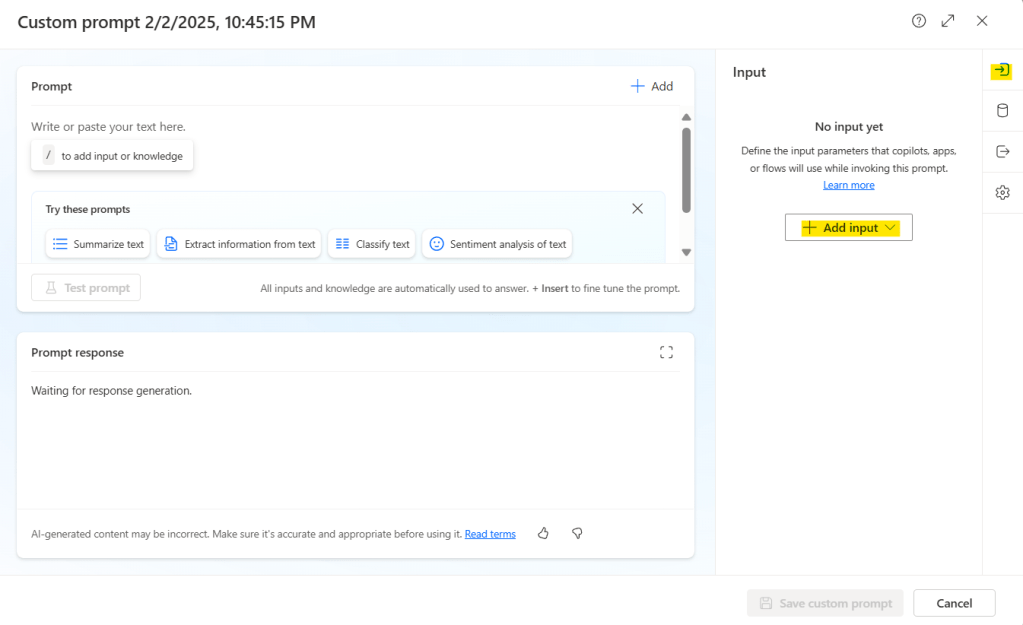
Select input data type. In my case, choose ‘Image or document (preview)’ and this will change the AI model to GPT-4o.

Name the input variable and build the prompt by combining the text and the variable. For example, if your input variable is “image”, you can create a prompt like:
Extract the relevant data from the receipt: {image}Name the input variable as “entity”, and create a prompt as follow:
Extract the following data fields from the receipt {entity} :
Store Name, Store Address, Contact Number, Date and Time, Transaction ID, Total Amount, VAT Amount, Payment Method, Item List for each item which consist of: Item Name, Quantity, Price

Output the extracted data in JSON format

For example:
{
 ""extracted_data"": {
  ""[entity 1]"": {""value"": [extracted value], ""type"": ""[data type]""},
  ""[entity 2]"": {""value"": [extracted value], ""type"": ""[data type]""},
  // Continue listing additional entities with their values and data types
  ...
 }
}
Upload the image or document, press ‘Test prompt’, and check the prompt response.

Go to ‘Output’ tab on the right-hand side, and then select ‘JSON’ radio button, then upload image, test prompt and check the prompt response.

If the prompt response look good, press ‘Save custom prompt’ button.
Create flow
- Use manually trigger a flow (for quick test)

2. Use ‘Create text with GPT using a prompt’ action
- Select your custom prompt
- Add dynamic content ‘Receipt content byte’ from the previous trigger

3. Use ‘Add a row into a table’ action
- Select ‘Location’
- Select ‘Document Library’
- Select ‘File’
- Select ‘Table’ (Excel table)
- Insert dynamic content ‘Date and Time value’ from previous action
- Insert dynamic content ‘Item List Item Name’ from previous action
- Insert dynamic content ‘Item Quantity value’ from previous action
- Insert dynamic content ‘Item Price value’ from previous action

Test Flow
Run flow and upload image


Leave a comment