
In this article, I’ll show how to use AI prompts in Power Platform.
- Create custom prompt
- Edit custom prompt
- Create desktop flow (test)
- Create cloud flow (test)
- Edit input/output between cloud/desktop
1. Create custom prompt
Go to Power Automate and click “More”.
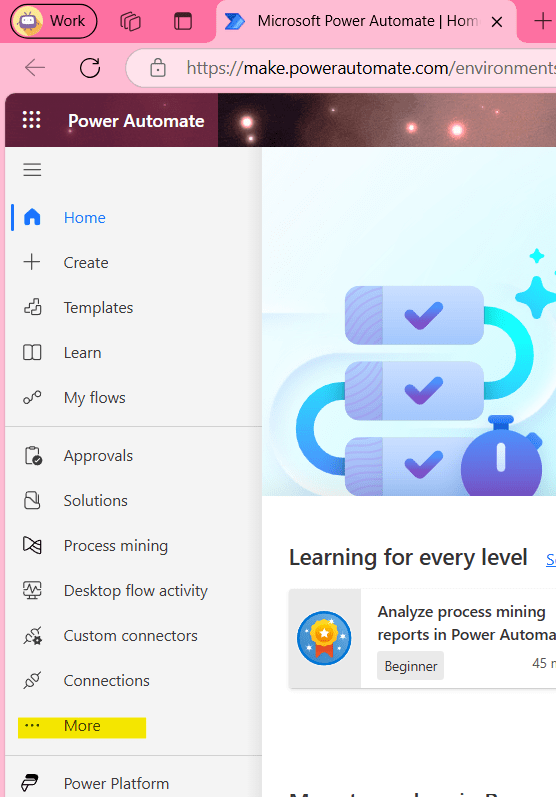
You can pin “AI Prompts” to display this menu on the left-hand sidebar.

Go to “AI prompts”.

Select “Build your own prompt”.

Select the “Input” tab on the right-hand side and click “Add input”.

You can choose the data type as “Text” or “Image or document”. However, in this article, we will select “Image or document” to extract invoice data.

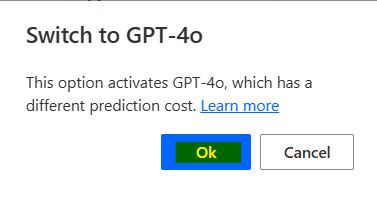
A popup will appear informing you that the model will change to “GPT-4o”. Click “OK” to proceed.
Name the variable

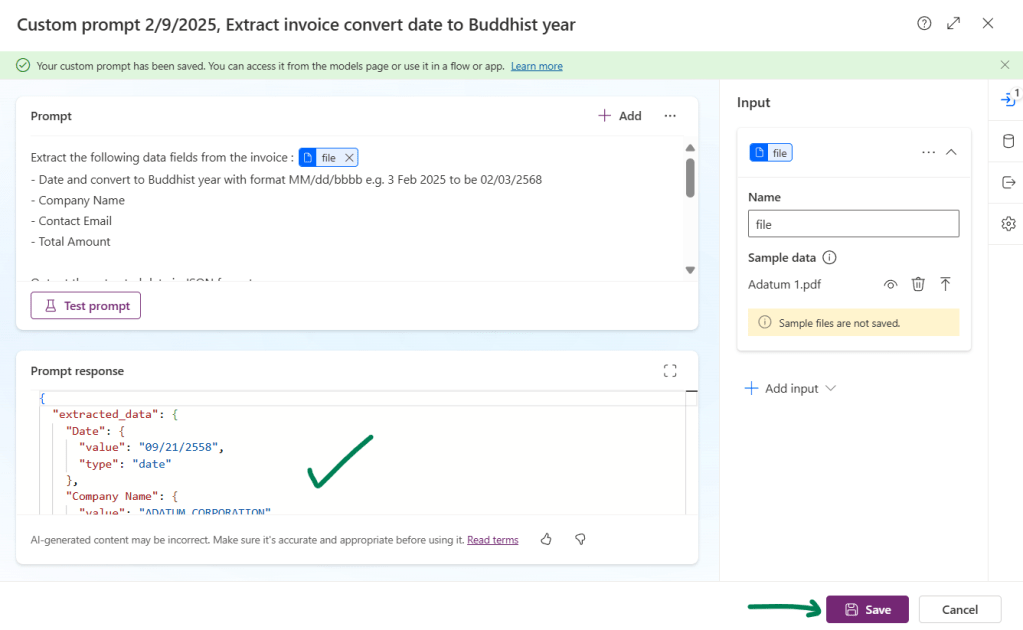
Create prompt as per below code block (replace {file} with the variable) and image:
Extract the following data fields from the invoice : {file}
- Date and convert to Buddhist year with format MM/dd/bbbb e.g. 3 Feb 2025 to be 02/03/2568
- Company Name
- Contact Email
- Total Amount

Output the extracted data in JSON format

For example:
{
""extracted_data"": {
  ""[entity 1]"": {""value"": [extracted value], ""type"": ""[data type]""},
  ""[entity 2]"": {""value"": [extracted value], ""type"": ""[data type]""},
  // Continue listing additional entities with their values and data types
  ...
}
}
Upload file and test prompt.

Check the prompt response. You can click the “Maximize” button at the top right corner to view it in full screen. If the response is correct, you can rename your custom prompt’s name and click the “Save” button.

2. Edit custom prompt
Select the “Output” tab on the right-hand side and select “JSON”, then the warning will appear informing you to test prompt before save.

Go to “Input” tab and test prompt again, check response and save.
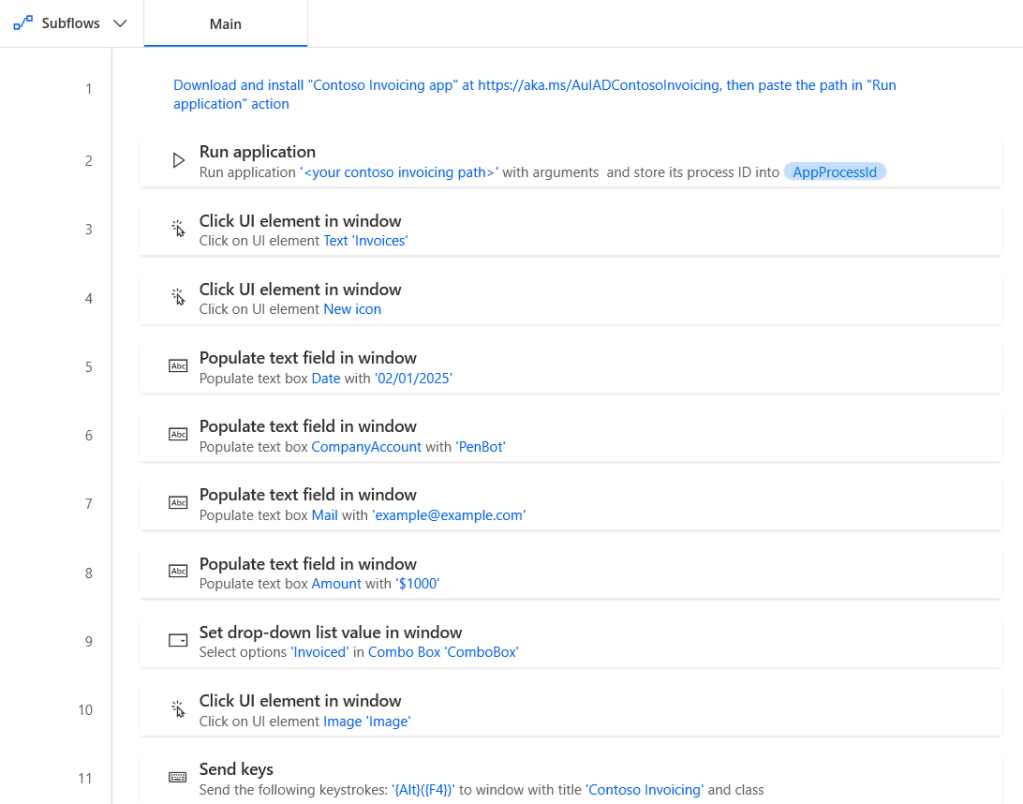
3. Create desktop flow
You can download the source code here
4. Create cloud flow
Go to Create, select “Automated cloud flow”, enter a name for the flow, and find the trigger “When a new email arrives (Office 365 Outlook)”.
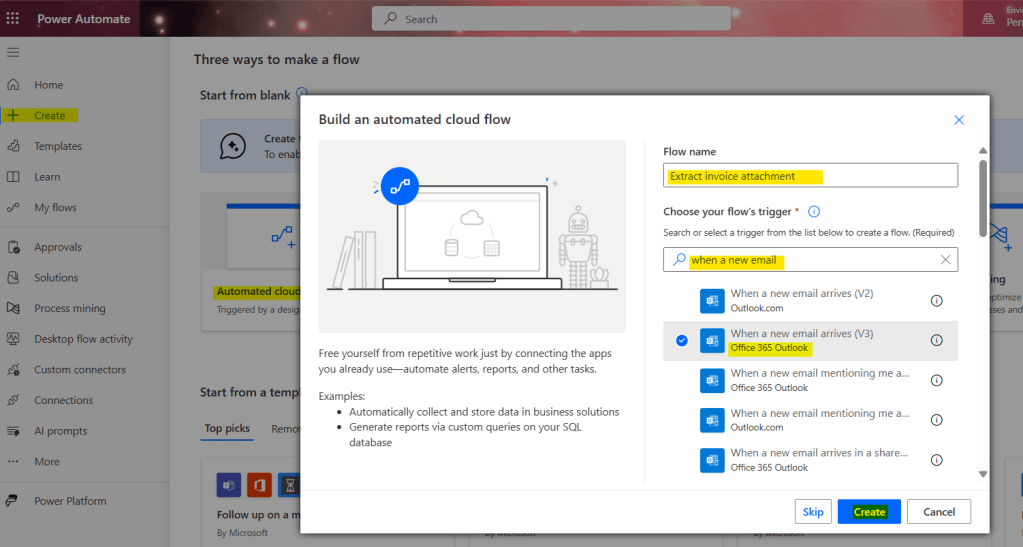
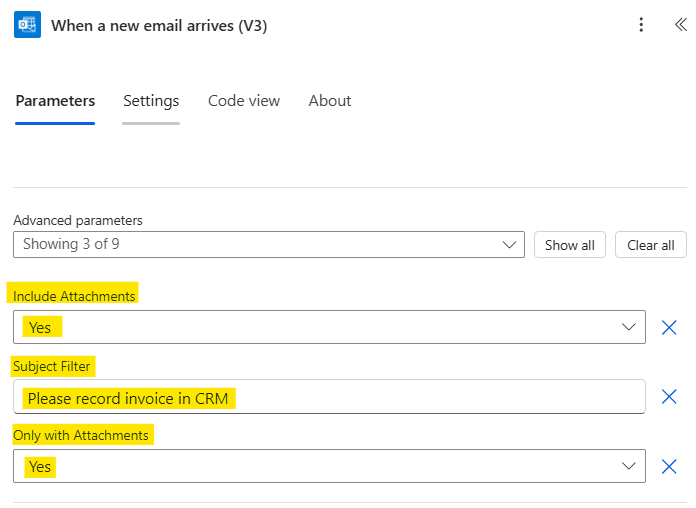
Select the dropdown for parameters and set the condition, such as Subject Filter, to specify which emails will trigger the flow.

In this article, I am using the Subject Filter as “Please record invoice in CRM”. Select Include Attachments as “Yes”, and select Only with Attachments as “Yes”
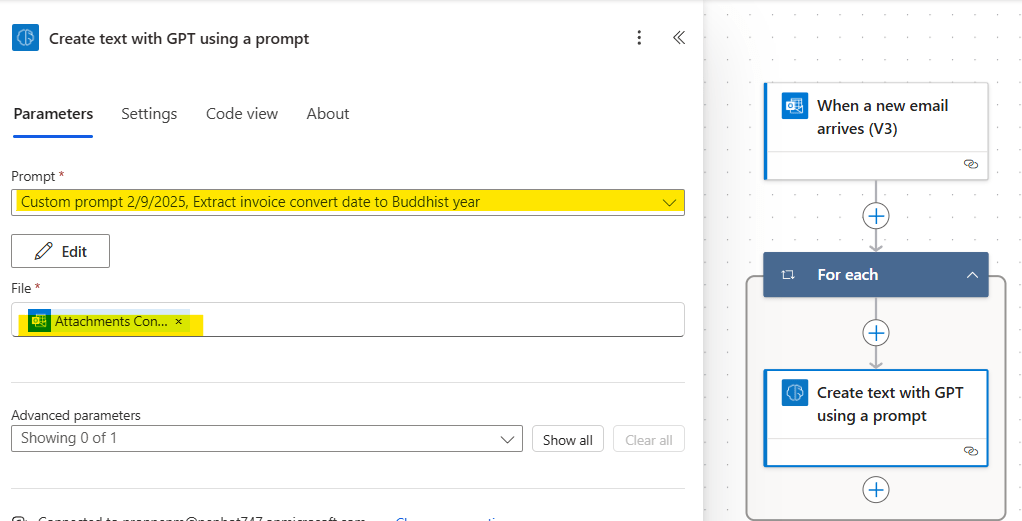
Click the “Add” button, then search for “Create text with GPT using a prompt” and select it.

Select your custom prompt under Prompts, then choose dynamic content for the file input.
Add “Send an Email” action and enter the email, subject, and body fields. In the body field, use the following dynamic content from the custom prompt:
- Company Name value
- Contact Email value
- Total Amount value
Note: This action is only used to preview the value from the previous action. We will delete this action once we obtain the required result.

For the date value, we need to compose it before the “Send an email” action. So, add a new action called “Compose” and select dynamic content as per below code block.
@{outputs('Create_text_with_GPT_using_a_prompt')?['body/responsev2/predictionOutput/structuredOutput/extracted_data/Date']}Add output of “Compose” in “Send an Email” action

Test the flow and check the value in email.

As you can see, the output from the Compose action is in JSON format, so we must use the “Parse JSON” action to extract it.
Content:
@{outputs('Create_text_with_GPT_using_a_prompt')?['body/responsev2/predictionOutput/structuredOutput/extracted_data/Date']}Schema:
{
    "type": "object",
    "properties": {
        "@@odata.type": {
            "type": "string"
        },
        "value": {
            "type": "string"
        },
        "type": {
            "type": "string"
        }
    }
}
Test the flow again and check the value in email.

Delete “Send an Email” action

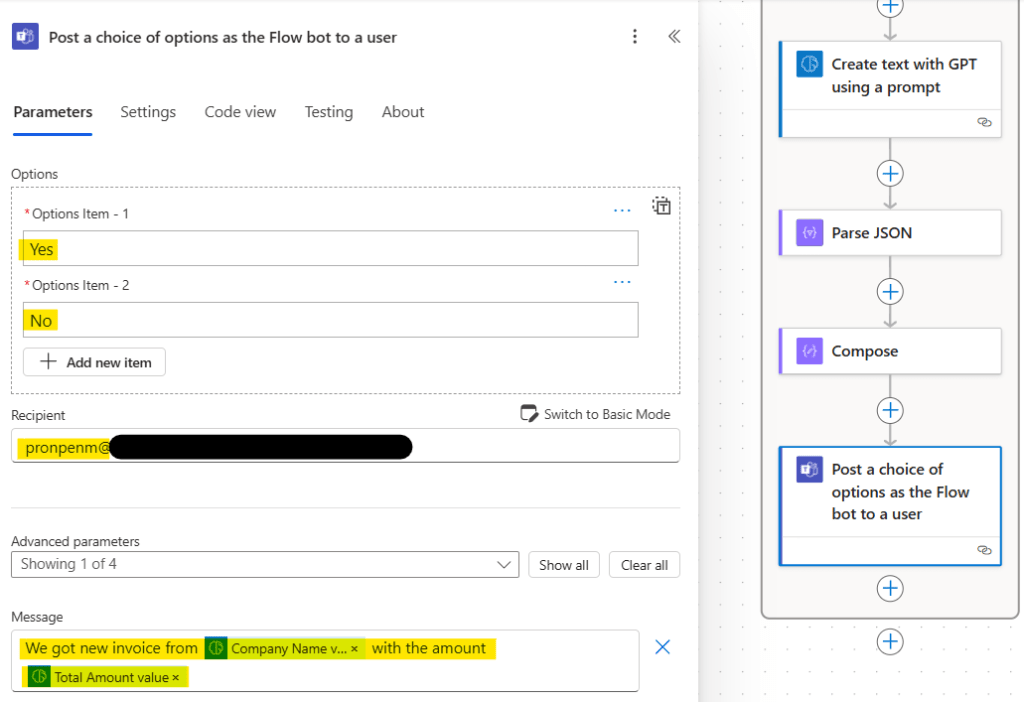
Click the “Add” button, then search for “Post a choice of options as the Flow bot to a user”, select it and set parameter as per below image:
Click the “Add” button, then search for “Condition”, select it and set parameter as per below image:

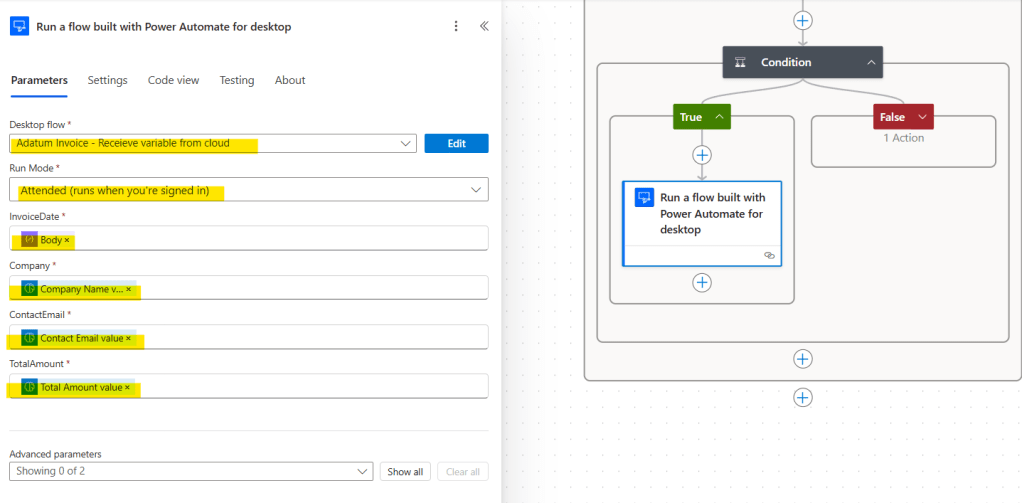
Click the “Add” button in the “True” condition, then search for “Run a flow built with Power Automate for desktop”. Select it and set the parameters as shown in the image below.

Note: This cloud flow will call a desktop flow that uses hardcoded values from the previous step, rather than using the values from AI prompts. In the next step, we will revise it to pass variables from the cloud flow to the desktop flow.
5. Edit input/output between cloud and desktop
Go to Power Automate Dektop > Variable tab > click the add button > select “Input”
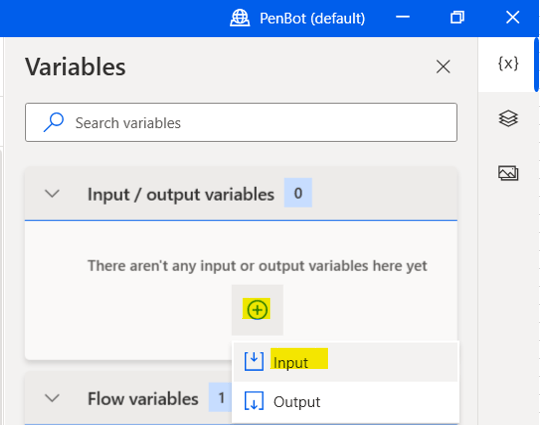
A pop-up window will appear. Add the variable name, select the data type, and specify the external name.

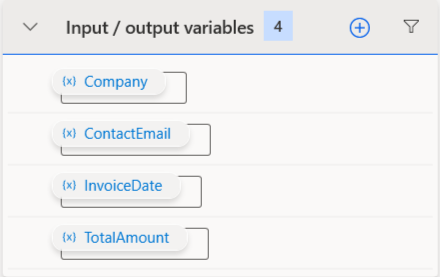
Create other input variable as per below image:
Replace the hardcoded text with the input variable to make the flow dynamic.


At Power Automate Cloud, change desktop flow and add dynamic content as input variable.
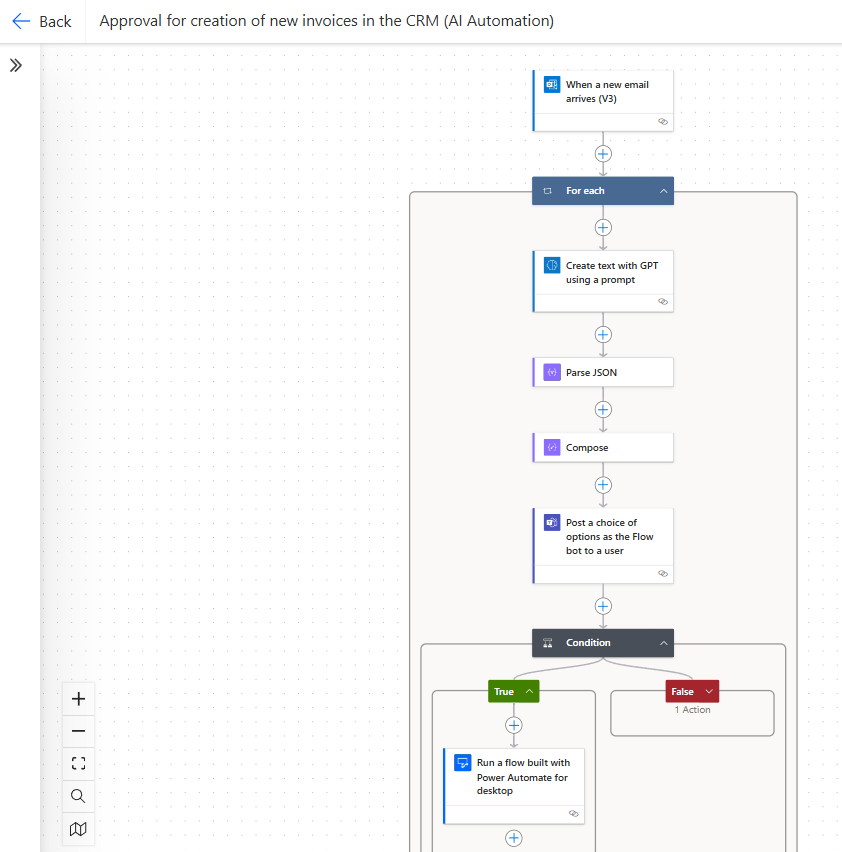
Final Flow

Leave a comment