
ในบทความนี้เราจะใช้ Microsoft Forms เป็น user interface ให้นักเรียน upload การบ้านของพวกเขา แล้ว Power Automate Cloud จะนำไฟล์แนบไปเก็บการบ้านแยกตามชื่อ Folder ของนักเรียน บน SharePoint library
สร้าง Microsoft Forms
สร้าง Microsoft Form โดยสร้างคำถาม 2 ข้อ:
- Name-Surname เพื่อใช้สร้างโฟลเดอร์ใน SharePoint
- Upload your file เพื่อสร้างไฟล์ใน SharePoint library
- ไปที่ https://forms.office.com/ แล้วกดปุ่ม “New Form”

2. ตั้งชื่อ form ยกตัวอย่างเช่น ‘Homework JPN101’ จากนั้นเลือก ‘Text’ เพื่อสร้างคำถามที่ต้องการคำตอบเป็นข้อความ

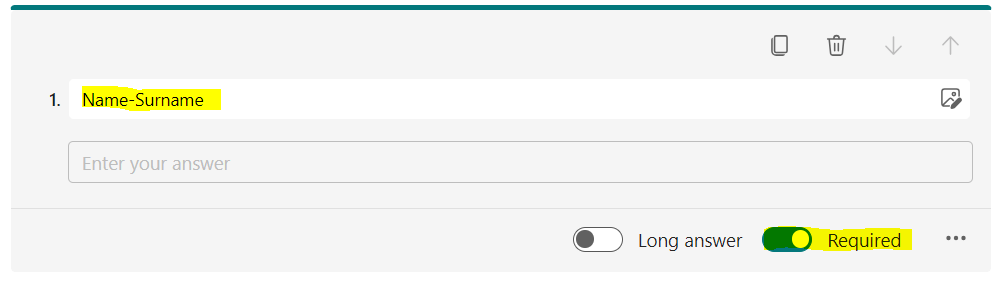
3. พิมพ์ ‘Name-Surname’ ในคำถาม แล้วเปิด toggle ‘Required’ ตามรูปด้านล่าง
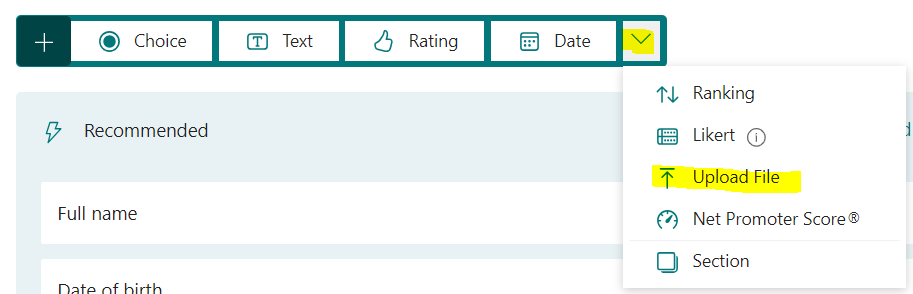
4. เลือก ‘Upload File’ ตามรูปด้านล่าง
5. พิมพ์ข้อความ ‘Upload your file’ แล้วเลือก file number limit เป็น 1 และเปิด toggle ‘Required’ ตามรูปด้านล่าง

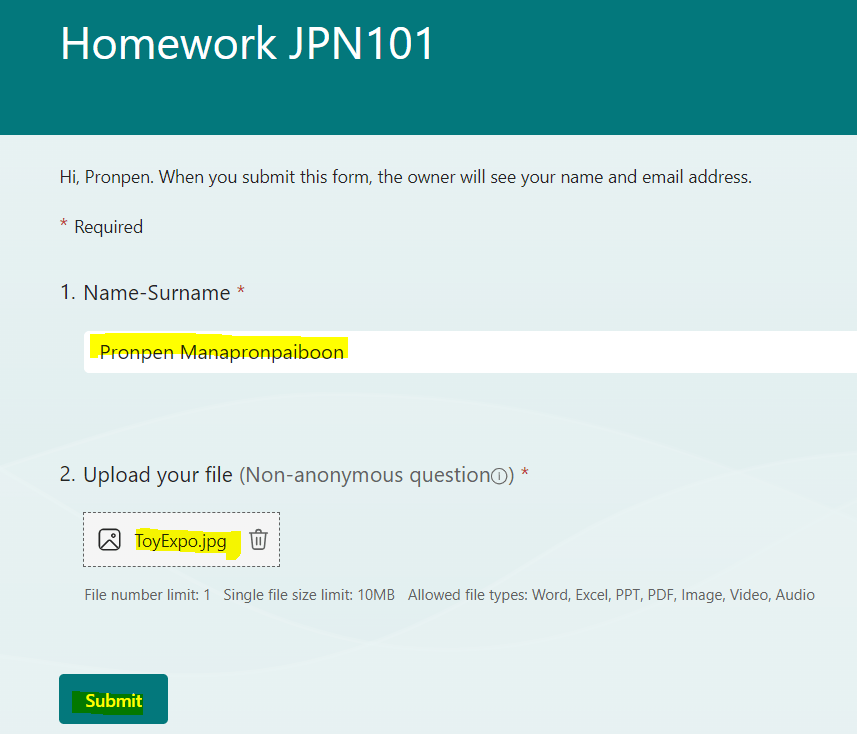
กดปุ่ม preview จะเห็น Form ในมุมมองของคนส่ง ตามรูปด้านล่าง

สร้าง SharePoint Library
ไปที่ SharePoint site ที่ต้องการเก็บไฟล์ ในที่นี้จะใช้ SharePoint site ที่มีอยู่แล้วชื่อ ‘Power Automate PenBot’ กด New > Document library

เลือก “Blank Library” แล้วตั้งชื่อ SharePoint Library เช่น “Homework JPN101”


สร้าง Flow
ไปที่ https://make.powerautomate.com/
กด “Create” เลือก “Automated cloud flow”

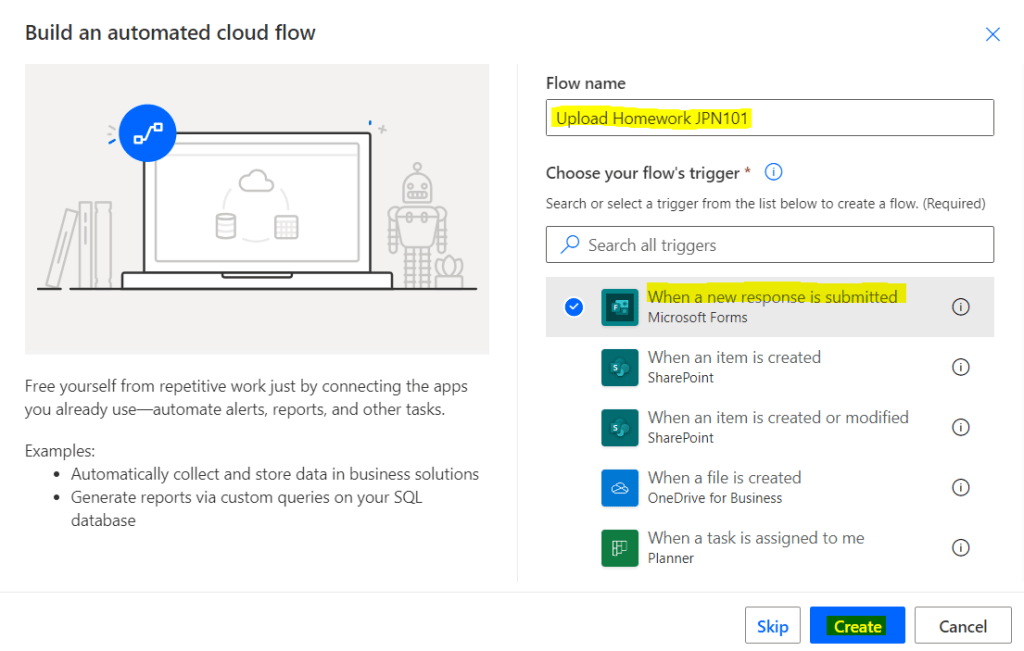
- ตั้งชื่อโฟลว์ เช่น “Upload Homework JPN101”
เลือก trigger “When a new response is submitted” แล้วกดปุ่ม “Create”
2. ใส่ค่าต่างๆ ใน Trigger ตามรูปด้านล่าง
- Form Id เลือกชื่อของ MS Form ในที่นี้ คือ “Homework JPN101”
- กด “New Step”

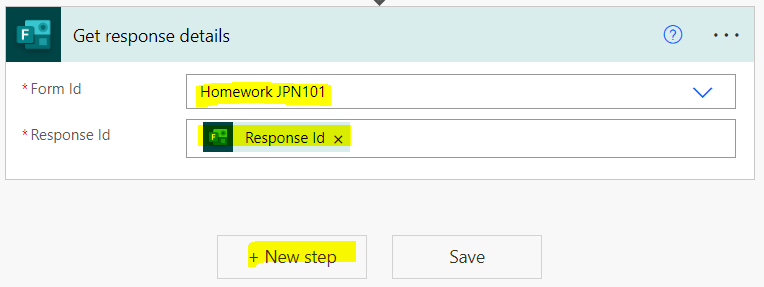
3. เลือก action “Get response details” แล้วใส่ค่าต่างๆ ดังนี้
- Form Id เลือกชื่อของ MS Form ในที่นี้ คือ “Homework JPN101”
- Response Id ใส่ dynamic content “Response Id” ที่ได้จาก trigger when a new response is submitted
- กด “New Step”
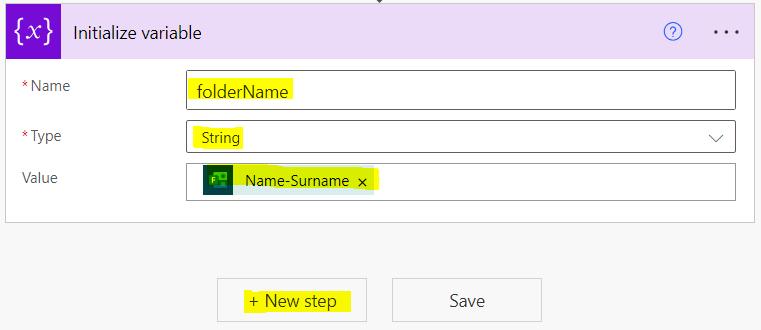
4. เลือก action “Initialize variable” แล้วใส่ค่าต่างๆ ดังนี้
- Name ตั้งชื่อตัวแปร ในที่นี้จะใช้ชื่อตัวแปรว่า “folderName”
- Type เลือก String
- Value ใส่ dynamic content “Name-Surname“(dynamic content นี้ได้จาก action Get response details โดยชื่อของ dynamic content นี้จะมาจากคำถามที่เราตั้งใน MS Form)
- กด “New Step”
จุดประสงค์ของ action นี้คือการตรวจสอบว่ามี folder ชื่อนักเรียนคนนั้นใน SharePoint library อยู่แล้วหรือไม่
5. เลือก action “Get items” ของ SharePoint แล้วใส่ค่าต่างๆ ดังนี้
- Site Address เลือก SharePoint site
- List Name พิมพ์ชื่อ SharePoint library (SharePoint library ก็คือ List เช่นกันจึงสามารถใส่ชื่อ library ได้เลย)
- Filter Query ใส่ตามรูปด้านล่าง หรือ copy จากโค้ดด้านล่างแล้วไปใส่ dynamic content ใครที่อยากรู้ว่าทำไมเขียนชื่อคอลัมน์แบบนี้ ลองดูคลิปของ Mr. Alireza ที่นี่
- กด “New Step”
ContentType eq 'Folder' and FileLeafRef eq 'เลือก dynamic content'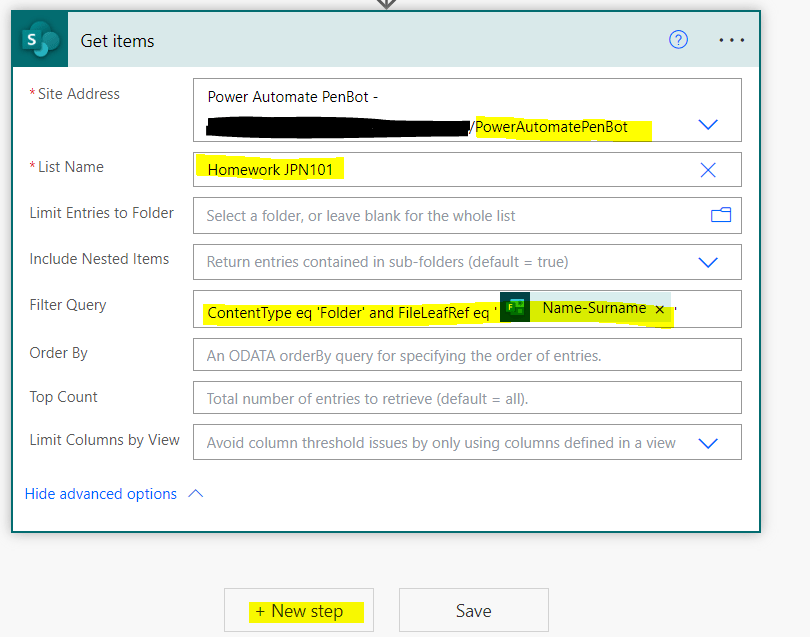
Noted: ปกติคอลัมน์ “content type” จะถูกซ่อนไว้ตั้งแต่ตอนที่สร้าง SharePoint library

คอลัมน์ “Name” มีชื่อจริงๆ ว่า “FileLeafRef”

6. เลือก action “Condition” แล้วใส่ค่าต่างๆ ดังนี้
- กล่องซ้าย ใส่ expression lenght() แล้วเลือก dynamic content “value” จาก Get items” (สามารถดูโค้ดได้ด้านล่าง)
- กล่องกลาง เลือก “is equal to”
- กล่องขวา ใส่ 1 (มีโฟลเดอร์ชื่อนักเรียนคนนั้นอยู่แล้วใน SharePoint library)

Code ใน condition กล่องซ้าย:
length(outputs('Get_items')?['body/value'])7. เลือก action “Apply to each” ใส่ที่ฝั่ง “If yes” แล้วใส่ค่าต่างๆ ดังนี้
- เขียน expression json() แล้วเลือก dynamic content “Upload your file” from Get response details” (สามารถดูโค้ดได้ด้านล่าง)
- กด “Add an action” ใน apply to each

Code ใน apply to each จะมีหน้าตาแบบนี้ (dynamic content จะได้ค่าไม่เหมือนกัน):
json(outputs('Get_response_details')?['body/rd2f5334812b240c891fe49e79f108dad'])8. เลือก action “Get file content” ของ OneDrive ใส่ expression ตาม code block ด้านล่าง แล้วกดปุ่ม “OK” จากนั้นกด “Add an action” ใน apply to each
item()?['id']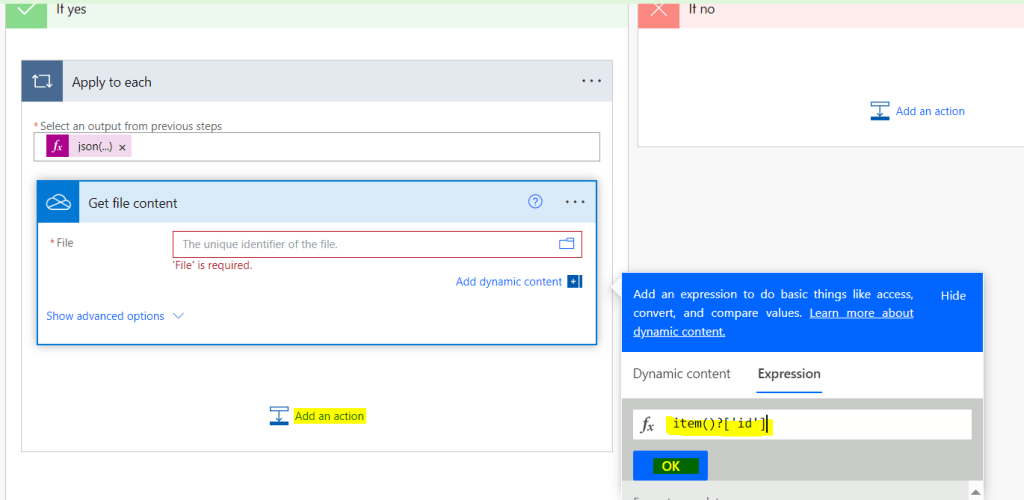
เราใช้ OneDrive connector เพราะ attachment จาก Microsoft Forms จะถูกเก็บไว้ที่ OneDrive
ขั้นตอนนี้คือไป get file content แต่ละไฟล์ที่ถูก Upload ใน MS Forms (ซึ่งเก็บอยู่ที่ OneDrive)
9. เลือก action “Create File” ของ SharePoint
- Site Address เลือก SharePoint site
- List Name พิมพ์ชื่อ SharePoint library แล้วใส่ / และเลือก dynamic content “folderName” จาก Initialize Variable
- เขียน expression ใน File Name ตาม code block ด้านล่าง
- Select dynamic content “File content” from “Get file content”
item()?['name']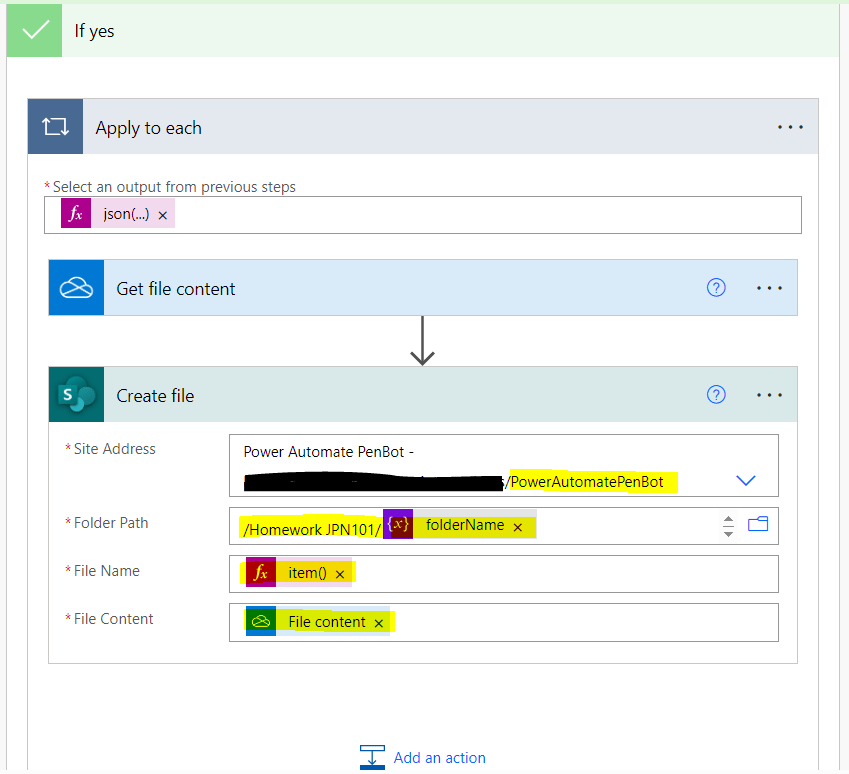
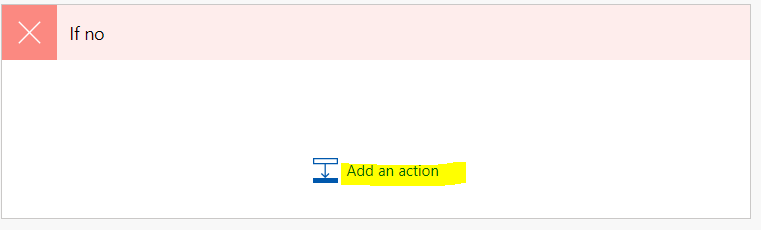
10. กด Add action ที่ฝั่ง “If no” (ไม่มีโฟลเดอร์ชื่อนักเรียนคนนั้นอยู่ใน SharePoint library)
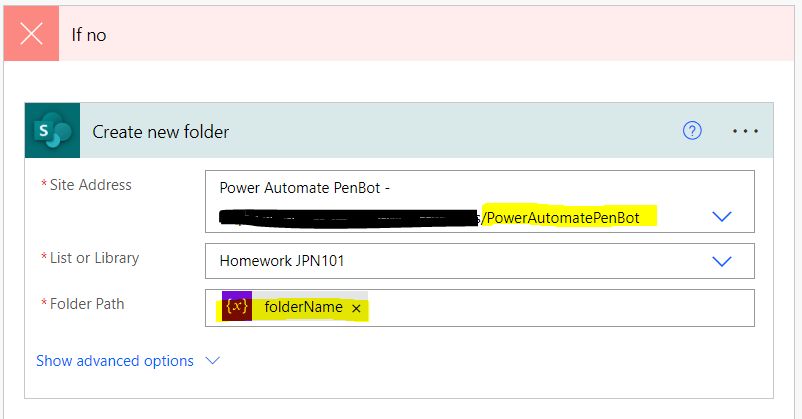
11. เลือก action “Create new folder” ของ SharePoint
- Site Address เลือก SharePoint site
- List or Library เลือก SharePoint library
- Folder Path ใส่ dynamic content “folderName” จาก Initialize Variable
12. Copy “Apply to each” จากฝั่ง “If yes”

13. กด add action ที่ฝั่ง “If no”
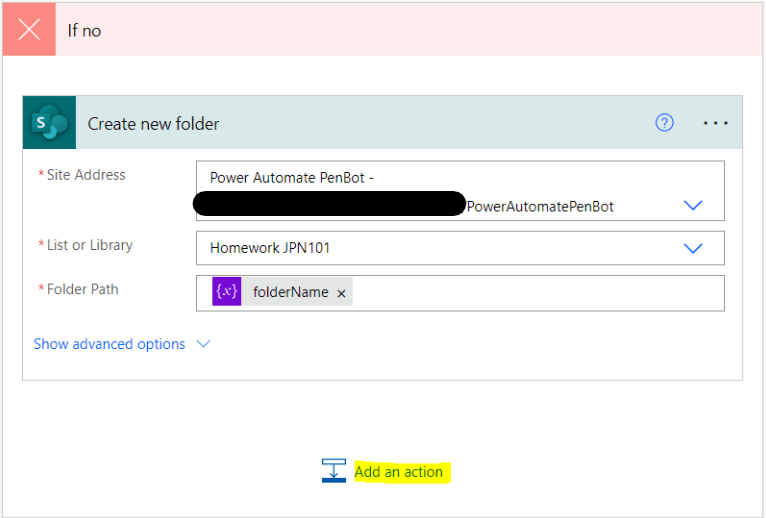
เลือก “My Clipboard” แล้วเลือก “Apply to each”

โฟลว์ที่เขียนเสร็จแล้ว:

Test
ใส่ข้อมูล อัพโหลดไฟล์ กด Submit Form

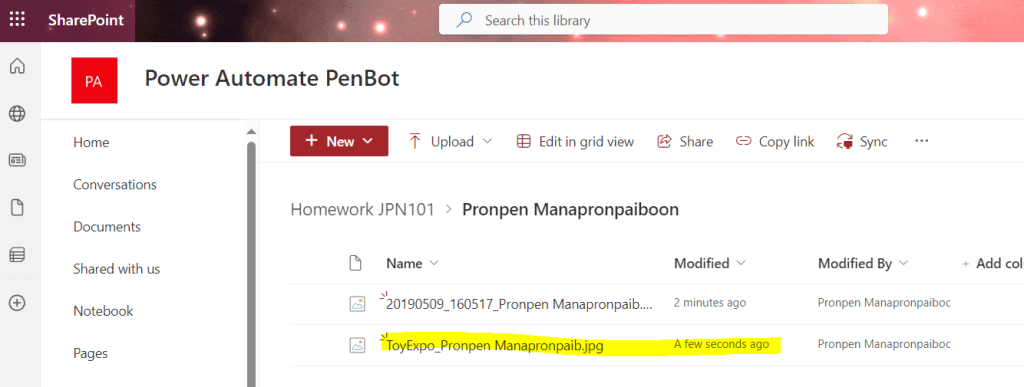
รอโฟลว์รันแล้วตรวจสอบ SharePoint Library
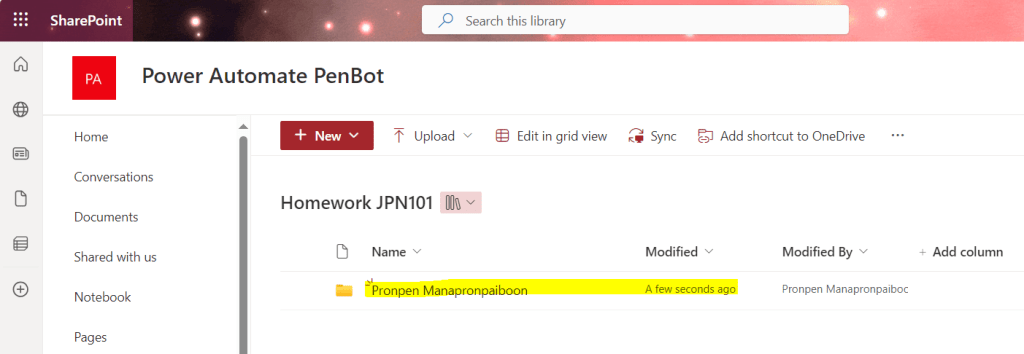

ลองส่ง form ไปอีก โดยใช้ชื่อนักเรียนคนเดิมกับก่อนหน้านี้
Video

Leave a comment