
In this article, we will use Microsoft Forms as the user interface for students to upload their homework. Then, Power Automate Cloud will save their files to a SharePoint library, organized by their first and last names.
Create Microsoft Forms
First, we will create a Microsoft Form with two questions:
- Name-Surname to create the folder in SharePoint
- Upload your file to create the file in the SharePoint library
- Go to https://forms.office.com/ and press “New Form” button

2. Name the form, for example, ‘Homework JPN101’, then press the ‘Text’ button to select the question type as ‘Text’

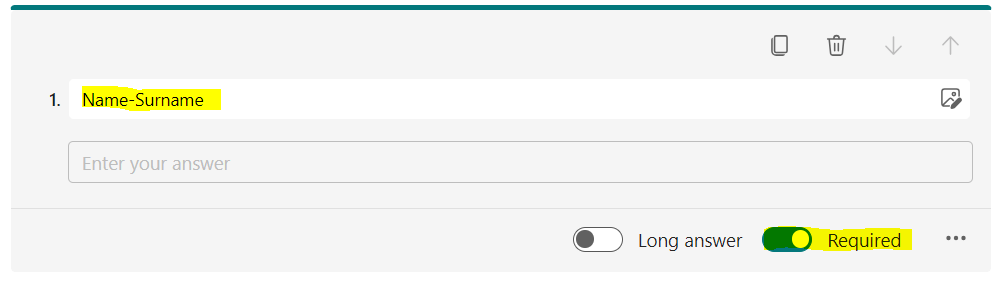
3. Type ‘Name-Surname’ in the question field, then toggle on the ‘Required’ option as shown in the image below
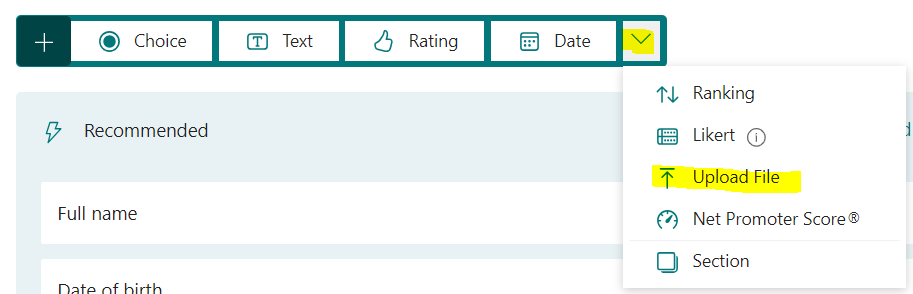
4. Select ‘Upload File’ as the question type.
5. Type ‘Upload your file’ in the question field, then select file number limit as 1 and toggle on the ‘Required’ option as shown in the image below

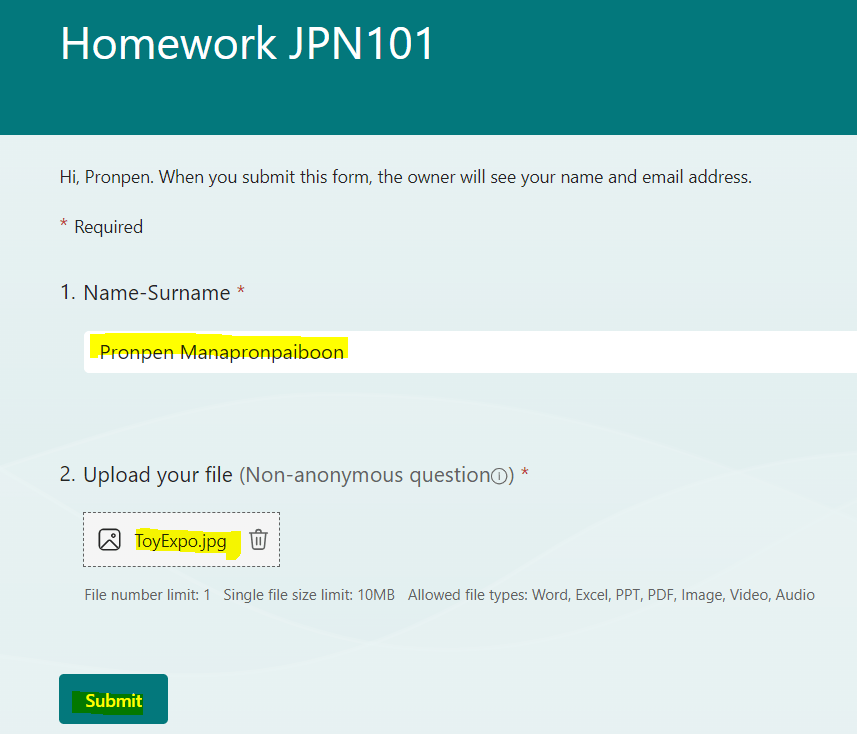
Click preview button, the Form will shown as per below image

Create SharePoint Library
Go to the SharePoint site where you want to collect the files, then create a SharePoint library.
In my case, I will use the existing SharePoint site named ‘Power Automate PenBot’. Press ‘New’ and select ‘Document library’.

Then, select “Blank Library” and name the SharePoint Library name such as “Homework JPN101”


Create Flow
Go to https://make.powerautomate.com/
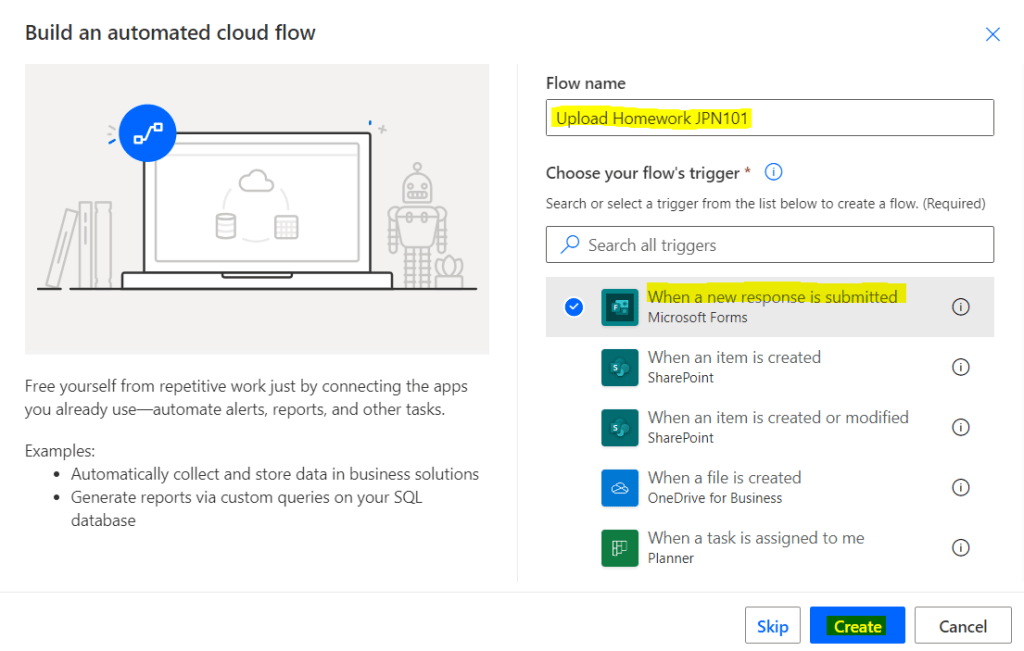
Press “Create” tab, select “Automated cloud flow”

Name the flow, for example, “Upload Homework JPN101”, select trigger “When a new response is submitted”, and press “Create” button
Select Form Id, and press “New Step”

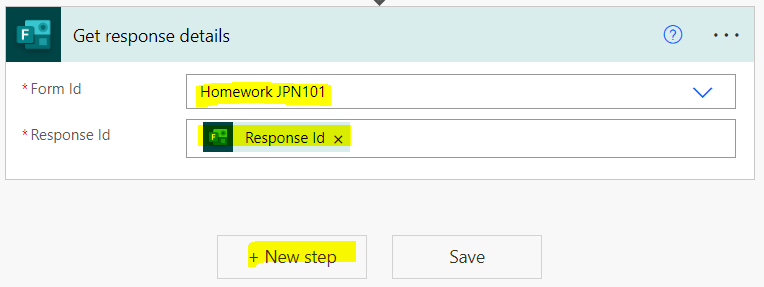
Select “Get response details” action, select Form Id, add dynamic content Response Id and press “New Step”
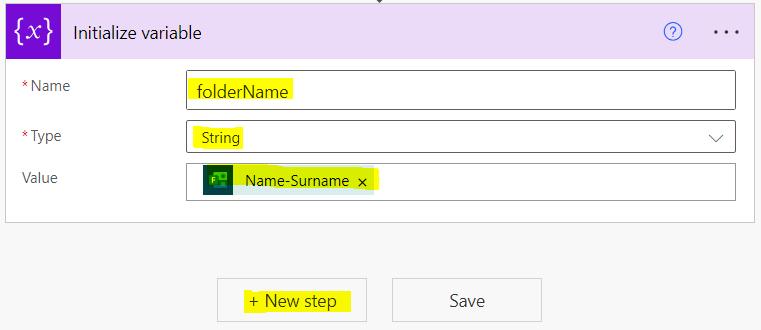
Select “Initialize variable” action, name the variable, select variable type, add dynamic content as per below image and press “New Step”
The purpose of this action is to check for an existing folder name in the SharePoint library
Select the ‘Get items’ action
- Choose your SharePoint site
- Type your SharePoint library name in the ‘List Name’ field (every SharePoint library is essentially a list, so you can enter the library name here)
- Enter the Filter Query as shown in the image below. For more details, you can watch this video by Mr. Alireza
- Press “New Step”
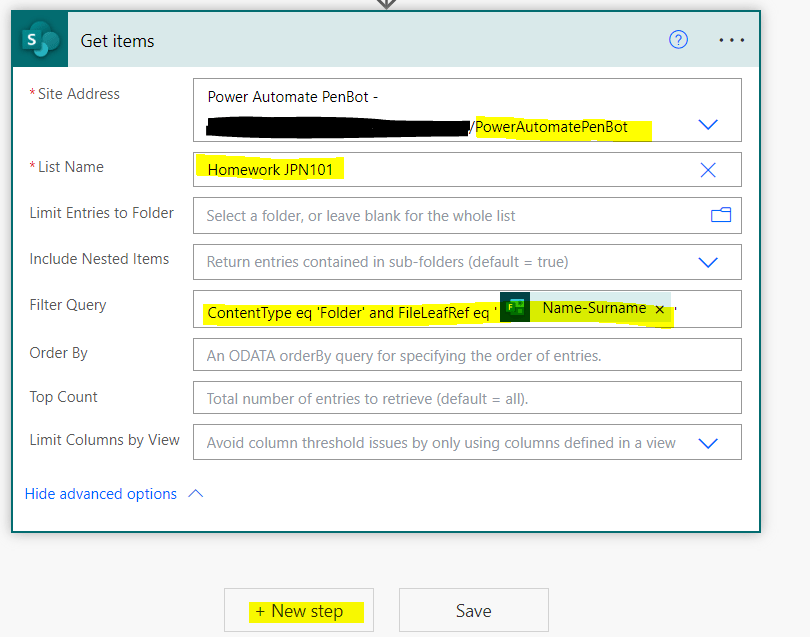
Noted: Normally, the “content type” column is hidden when we create a SharePoint library.

The “name” column, actual name is “FileLeafRef”

Select the “Condition” action, enter the condition as expression lenght() and select dynamic content “value” from Get items”, choose “is equal to”, and type the value 1. (Folder of that user already exist in SharePoint library)

The code of condition will be like this:
length(outputs('Get_items')?['body/value'])Then, add an “Apply to each” action under the “If yes” branch and do following steps:
- write expression json()
- select dynamic content “Upload your file” from Get response details”
- press “Add an action” in apply to each

The code of apply to each will be like this:
json(outputs('Get_response_details')?['body/rd2f5334812b240c891fe49e79f108dad'])Add “Get file content (OneDrive)” and type expression as per below code block, press “OK” button, and press “Add an action” in apply to each
We use OneDrive connector because the attachment from Microsoft Forms will store in the OneDrive
item()?['id']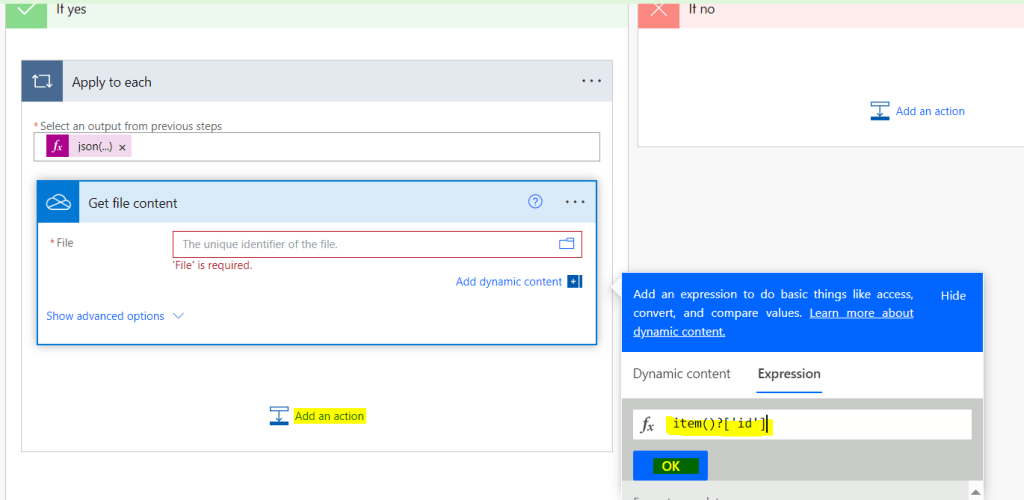
These steps mean that for each response detail from MS Forms, you will retrieve the file content of each id.
Add “Create File (SharePoint)”
- Choose your SharePoint site
- Select your folder and type / and select dynamic content “folderName” from “Initialize Variable” step
- Write expression in File Name as item()?[‘name’]
- Select dynamic content “File content” from “Get file content”
item()?['name']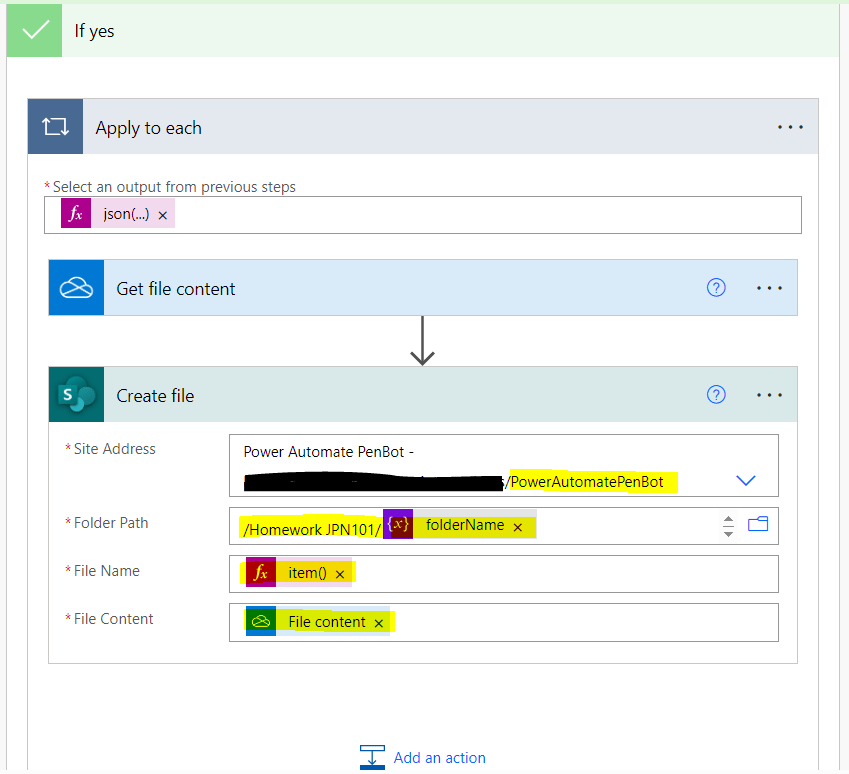
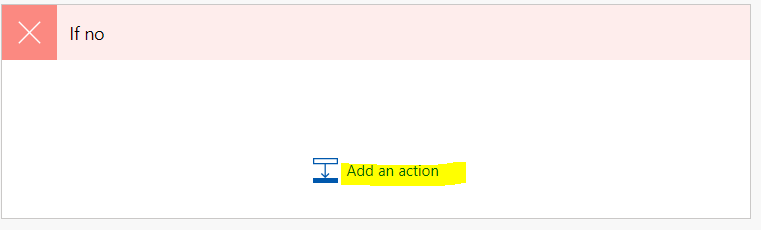
Add action under the “If no” branch (Folder of that user not exist in SharePoint library)
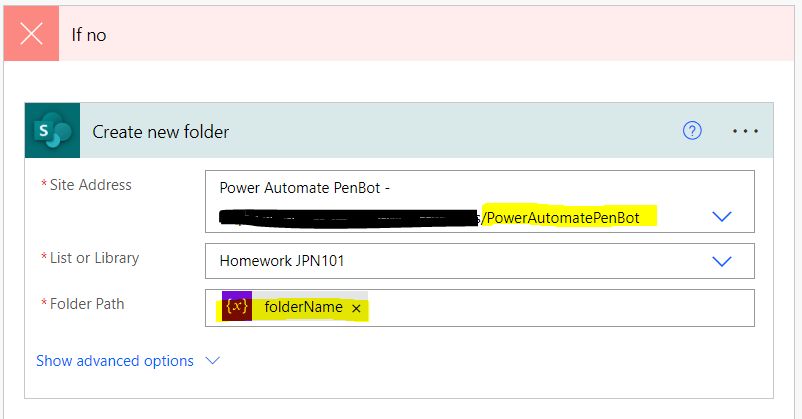
Add “Create new folder”
- Choose your SharePoint site
- Select SharePoint Library
- Add dynamic content “folderName” from “Initialize Variable” step
Copy “Apply to each” from “If yes” branch

Then add action under the “If no” branch

Select “My Clipboard”, select “Apply to each”

The completed flow will look like this:

Test
Submit Form

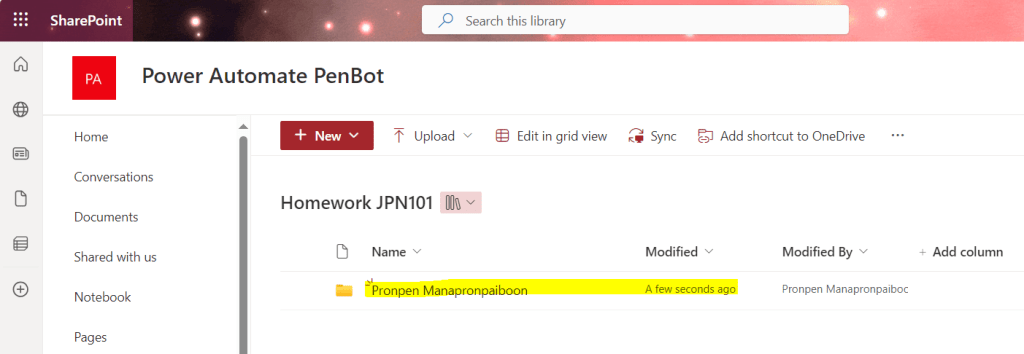
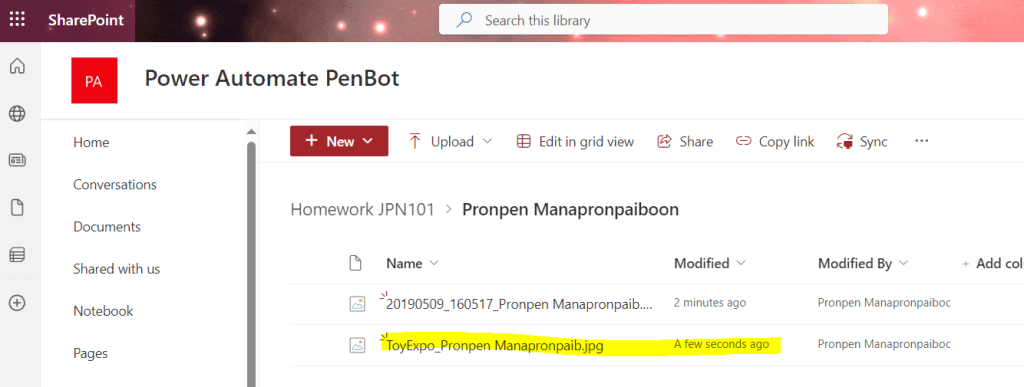
Check SharePoint Library

Submit another form with the same name as the previous one

Leave a comment