
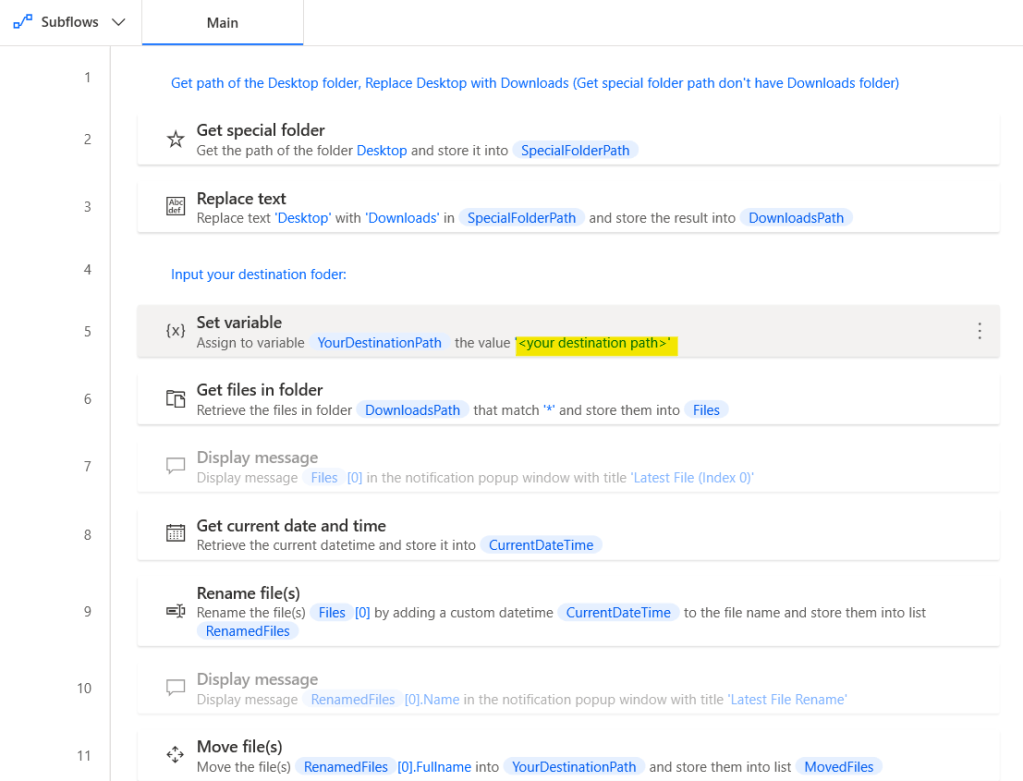
If you want to use Power Automate Desktop rename the most recent file in folder downloads follow with date and time, you can do it as follows step:
Get files in folder
Use Get files in folder action and set parameter as per below image, this setting will retrieve all file type in folder Downloads and sort it by creation time descending.
- Folder: you can click folder icon and select your folder path such as “C:\Users\User\Downloads“
- File filter: You can use the wildcard character * to filter file types. For example, if you want to filter Excel files, you can use *.xlsx for Excel 2007 and later versions. If you want to apply multiple file filters, you can separate them with a semicolon, like *.xls;*.xlsx for Excel 97 through Excel 2003 and Excel 2007 and later versions
- Advanced: Sort by Creation time, open toggle descending

This action will collect the files and store as a list of file in variable name as Files the most recent file will store in index 0.

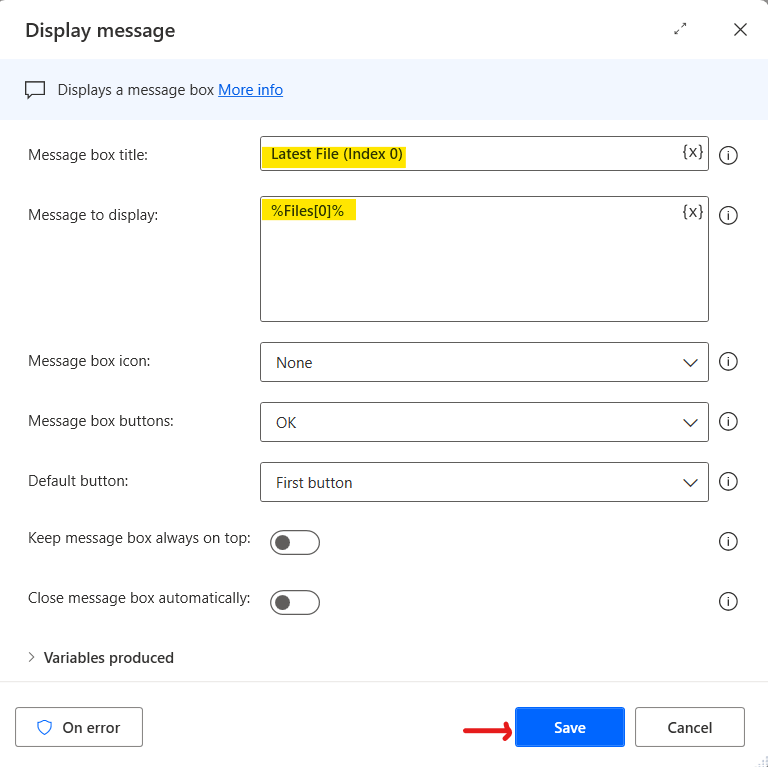
Display message
Use Display message action for check the Index 0 in Files variable
To retrieve a specific item in a list, use the following notation: %VariableName[ItemNumber]%
Therefore the message to display will be %Files[0]%.
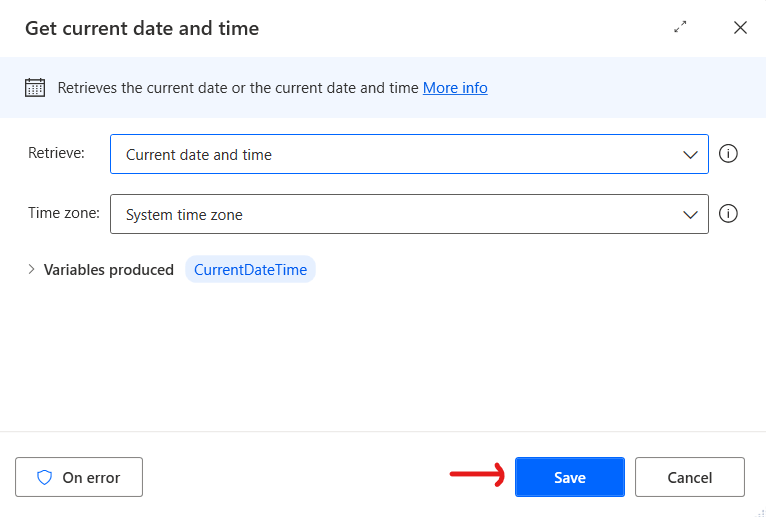
Get current date and time
Use Get current date and time action this action will store date and time in CurrentDateTime variable.
Rename file(s)
Use Rename file(s) action and set parameter as per below image, this action will rename the most recent file %Files[0]% in Downloads folder and add datetime using %CurrentDateTime% variable separate with underscore in custom format yyyy-MM-dd_hhmmsstt after the original file name, then store the new name in RenamedFiles variable.
Note: You can use other rename scheme e.g. set new name, add text, remove text, replace text, change extension, make sequential

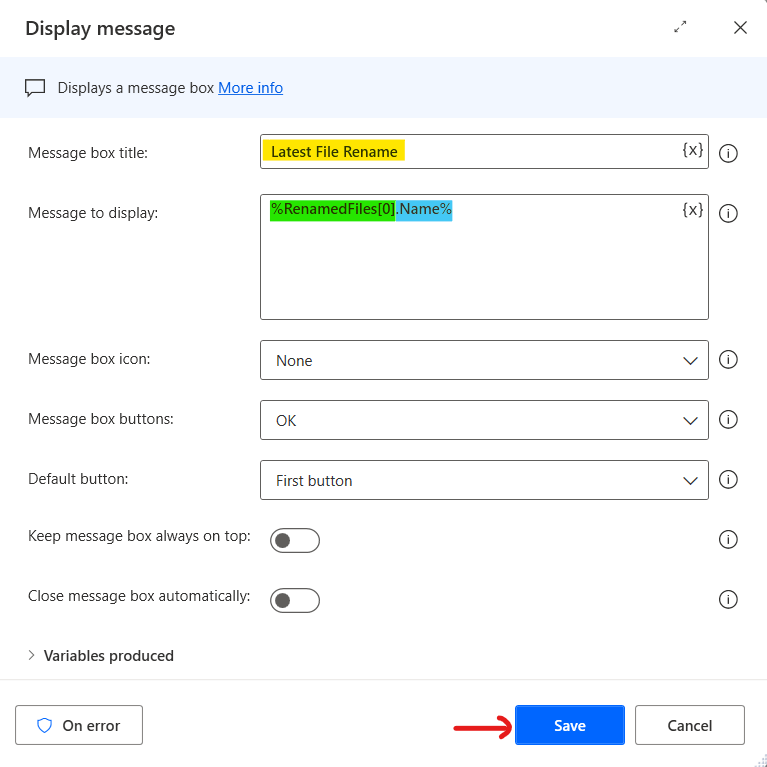
Display message
Use Display message action for check the Index 0 in RenamedFiles variable.
To retrieve a specific item in a list, use the following notation: %VariableName[ItemNumber]%
RenamedFiles variable data type is list of files, so we can use file properties for coding.
In this case, I want to display the name of renamed file so I set message to display as %RenamedFiles[0].Name%.
Move file(s)
Use Move file(s) action for move the most recent file (the Index 0 in RenamedFiles variable) to destination folder.
- File(s) to move: use file properties Fullname property from RenamedFiles variable %RenamedFiles[0].Fullname%.
- Destination Folder: you can click folder icon and select your folder path such as “C:\Users\User\Desktop“
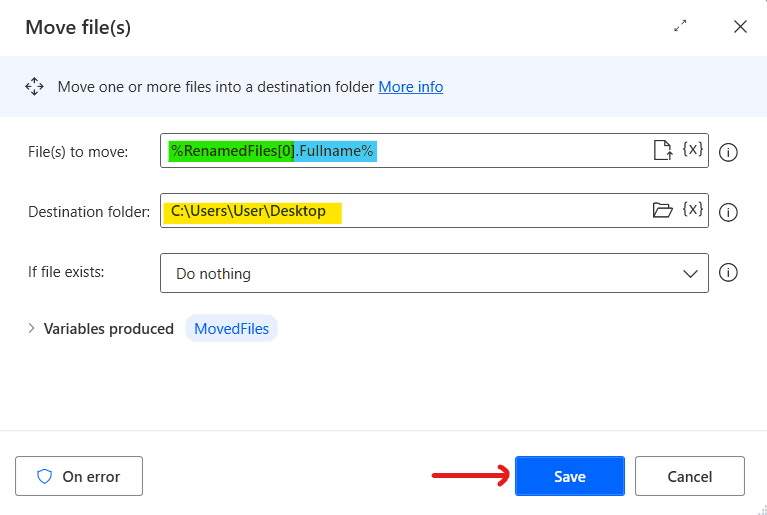
Set parameter as per this image for move file
Completed Flow

Test and Check Result
Go to Dowloads folder, create new text file name as “TestRename.txt”

Go to Power Automate Desktop, Press Save and Run.
At the 2nd line action, Display message, the message box will show C:\Users\User\Downloads\TestRename.txt

At 6th line action, Display message, the message box will show the Name property of renamed file as TestRename_2024-03-23-105851AM.txt

Go to Destination folder, in this case is Desktop folder, we will found the Renamed file was moved to the destination folder successfully.

Edited Flow for Ready to Use
You can copy code from github to Power Automate Desktop and input your destination folder in 5th line action, Set variable, then save and run

Leave a comment