
Power Automate Desktop is a low code/no code RPA (Robotic Process Automation) software used to automate various tasks through the User Interface on computers.
It can helps with large volumes of work, work with repetitive patterns, and work with fixed decisions.
Therefore, RPA was born to help people do repetitive, tedious tasks and reduce errors that might happen.
Power Automate’s history
- Nov 2016 Release Microsoft Flow that helps in automating workflow through Cloud Service
- Nov 2019 Rebrand Microsoft Flow to Microsoft Power Automate and add RPA function UI flow
- Sep 2019 Rebrand RPA function UI flow to Power Automate Desktop (separated from Power Automate or Power Automate Cloud)
- Mar 2021 Power Automate Desktop can be used for free

Translate from:
岩元直久, Microsoft Power Automate かんたん活用ガイド-自動化ツ−ルの大本命!(2021), p.18
In many Japanese language books and classes, instructors often abbreviate Power Automate as PA, which stands for Power Automate Cloud, and Power Automate Desktop is abbreviated as PAD.
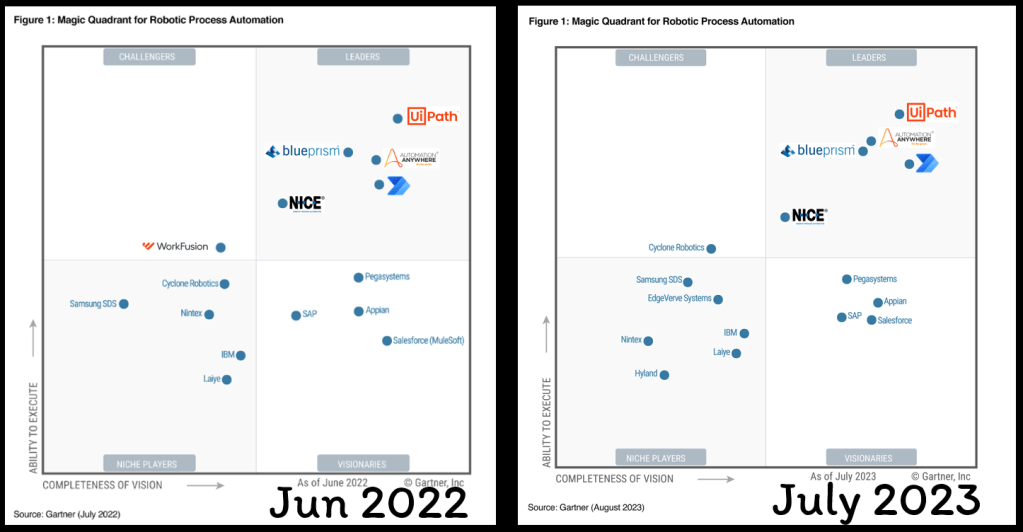
If you take a look at the Magic Quadrant for RPA software, you will see that when Microsoft made Power Auomate Desktop free in 2021, Ability to Execute increased until it was in the Leaders Quadrant.

Power Automate Desktop User Interface
consist of:
- Console
- Flow Designer
Console
There will be various tabs such as Home, My flows, Examples.

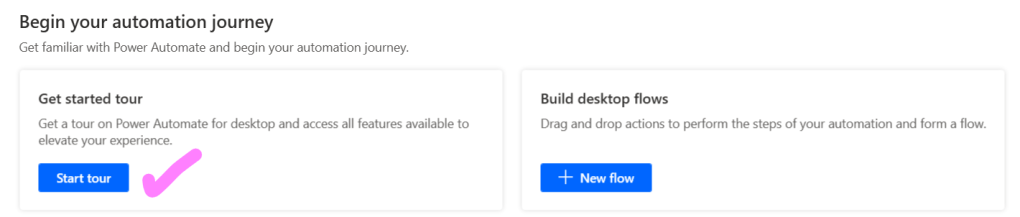
On the Home page, we can press Get started tour to let the program help introduce basic features.
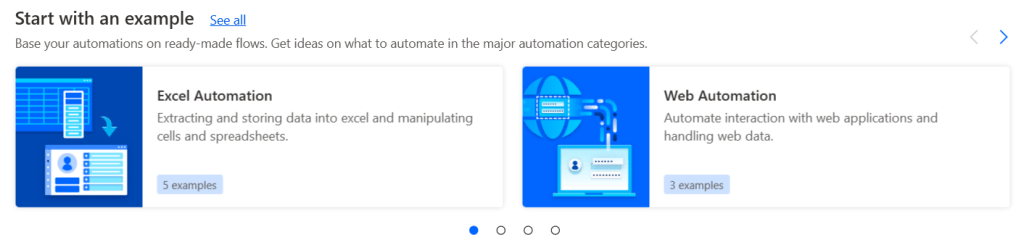
Scroll down and there will be Start with Example (same as the Examples tab). Let us go to the examples that Microsoft has written for various flows such as Excel Automation, Web Automation.
Scroll down a little more and there will be Tutorials that will link to Microsoft Learns to study Power Automate Desktop and collect XP.

There are also useful links to various Microsoft documentation, release notes about program updates, and a community forum for discussion and asking questions about writing code.

Flow Designer
This will be the page we use to develop RPA by drag and drop.

On the left-hand side is the Actions Pane, which has various commands. Let us tell the robot what tasks it will need to do or what decision must be made.
These Actions are grouped according to the application that we want the robot to work, such as Excel, Database, Outlook, Mouse and keyboard, Conditionals, Loops, etc.
If we want to order the robot to work with Excel, press expand at Excel Actions. There will be various commands such as
- Launch Excel : Open Excel
- Read from Excel worksheet : Read data in Excel
- Get first free column/row from Excel worksheet : Find the first empty column/row in the worksheet
- There are also commands in Advanced such as Run Excel macro to run the macro.

Writing commands in Power Automate Desktop can be done easily by selecting the Actions we want to drag and drop into the workspace.
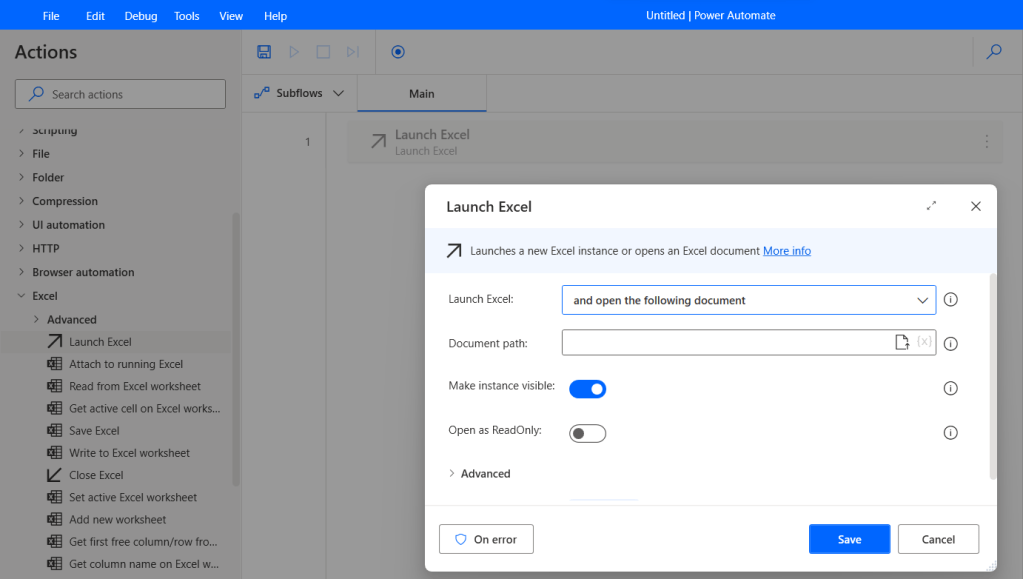
A window will pop up to adjust various values. It will look different depending on the command used and the selection of various parameters.
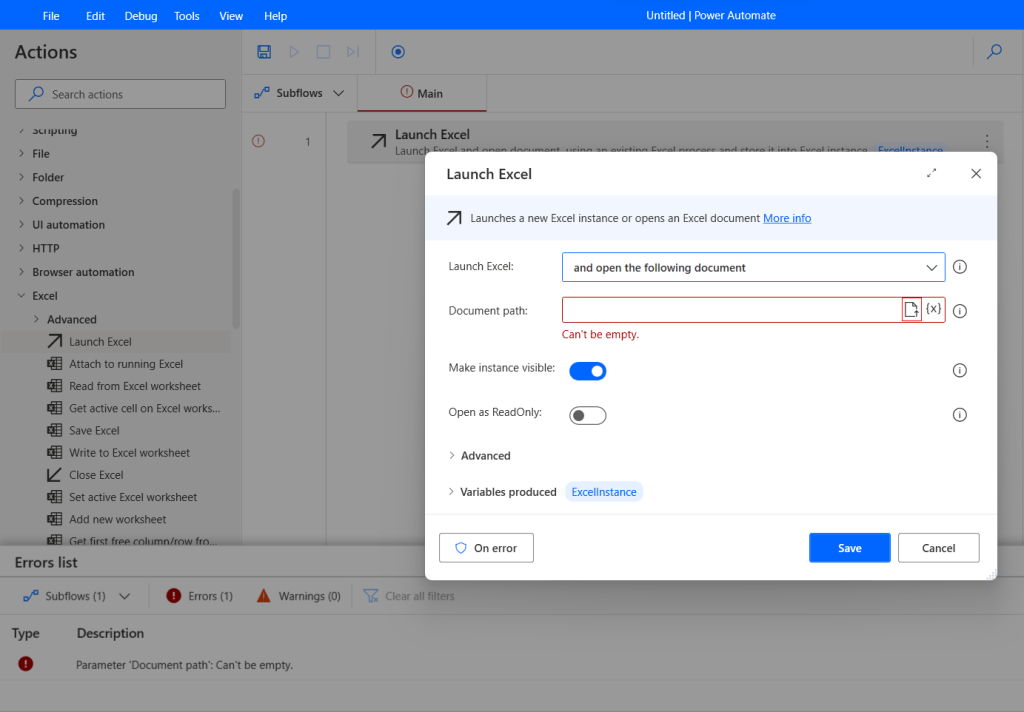
For example, we instruct the robot to open a new Excel file (Launch Excel with a blank document), it will not be told where the document path is.

On the other hand, if we instruct the robot to open the Excel file according to the path we specified (Launch Excel and open the following document), it will ask us to enter where the document path is.
If we don’t enter all required fields, an error will occur.
On the right-hand side, there are 3 tabs: Variables, UI elements และ Images
Variables
- Input/output variables are used to send and receive data between Power Automate Cloud and Power Automate Desktop.
- Flow variables are variables that Power Automate Desktop automatically creates from the action.
UI Elements
For capturing various objects on the screen or website page to order the robot to work according to our commands
Images
For capturing various images to order the robot to work according to our commands
For these 3 tabs on the right, are related to the Actions that we order the robot.
For example, when we use Launch Excel, the program will automatically create a Flow variable for us name as ExcelInstance on Variables tab
If we order the robot to press a button on the website page, that button will be stored in the UI Elements tab.
In the case of use capture an image, that image will be stored in the Images tab.
I’ll write the content about each actions in the next times 🙂
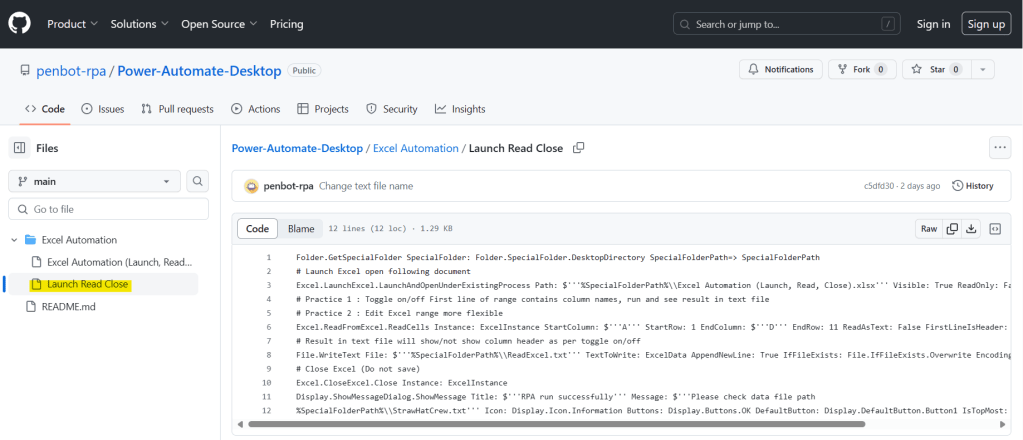
For anyone who wants to see the Power Automate Desktop code in this article, you can copy the code on github and paste it into the Workspace of Power Automate Desktop, but you’ll have to make some adjustments by yourself. (Try reading and reviewing this article again. You can definitely do it. ❤)
Hope this article will be useful to the people who just starting to study Power Automate Desktop, if you have any questions about this article, you can comment and ask section below.
Don’t forget to press like, share, subscribe for good articles from now on (press the subscribe button and you will receive a mail confirming your subscription to confirm again as well).
Until we meet again, Happy Automating!! 😁

Leave a comment