
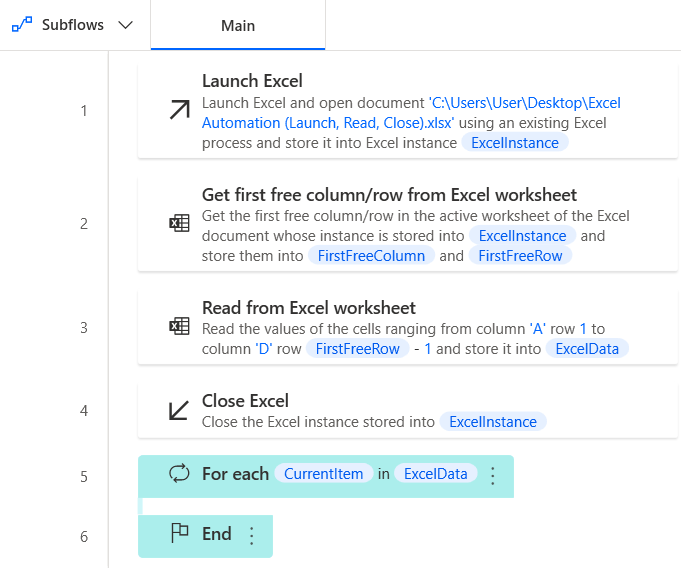
From the previous article on Read Excel with Power Automate Desktop, we already talked various commands in Excel including:
- Launch Excel
- Get first free column/row from Excel worksheet
- Read from Excel worksheet
- Close Excel
In that article We use the robot take the values read from the Excel range and store them in a variable named ExcelData, then use the Write text to file action to display the values in the text editor program (Notepad).
The results are separated by a comma(,) symbol between values of different column and split with a new line for the values of different row.

Right – Values in the Notepad file that the robot write.
In this article, we will use the “For each” action to read values of each line in the Excel file and display each values in the “Name” column.
Flow from previous article
Last time we used Write text to file to understand the setting in advanced option “first line of range contains column names”, but this time we didn’t use it. Therefore you can disable this action or delete it.

For each
Drag “For each” to the workspace next to “Read from Excel worksheet” action.
At the parameter “Value to iterate” enter the variable you want robot to repeat.
For this article, we will iterate the ExcelData variable, which is a data table type, and then press Save.

Note: You can enter variables that are list, data row, or data table.
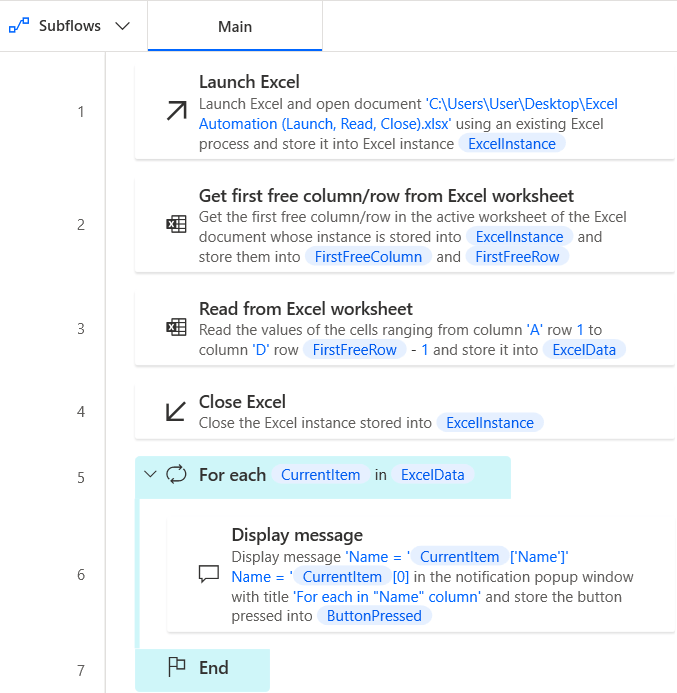
You will get the flow as shown below (the Write text to file command has been removed).
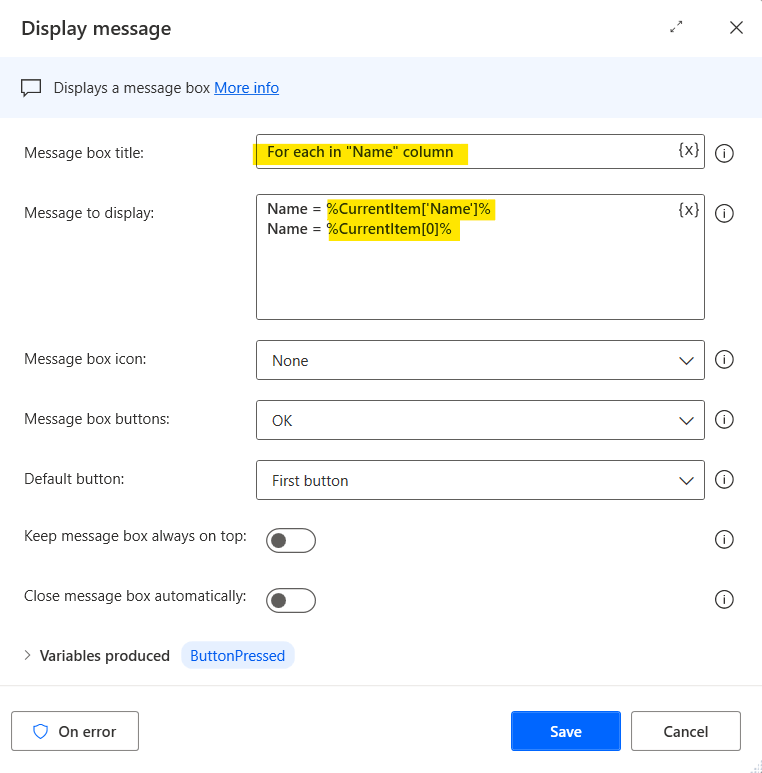
Display Message
Drag the Display message action and drop it between For each action and End action.
The parameter “Message box title” is the title bar of the message box that is displayed when the robot is run which can be entered as text or variables.
In this article, insert the text For each in “Name” column.
The parameter “Message to display” is the body of the message box that is displayed when the robot is run which can be entered as text or variables as well.
For each action use for repeat through the values in ExcelData and store them in CurrentItem variable, the CurrentItem variable will have a data type as data row. Read more details here.
Retrieving items in a Data row can be done in two ways:
- Use index column %VariableName[ItemNumber]%
- Use column name in data table %VariableName[‘ColumnName’]%
In this article, I want to extract the value in Column “Name” which is the first column (Column index = 0), so I can enter the variable as %CurrentItem[‘Name’]% or %CurrentItem[0]% as well.
Completed Flow
Press Save and then press run.
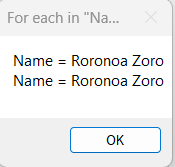
Example of Result
You will get a text box with Title and Body as per below image

How to apply?
จากบทความนี้เพ็ญใช้คำสั่ง Display Message เพื่อแสดงค่าที่อยู่ในแต่ละ Excel cell ออกมาให้เห็นว่าโรบอททำงานยังไง เวลานำไปใช้จริงก็แค่เปลี่ยนจากคำสั่ง Dispaly Message เป็นคำสั่งที่เราต้องการ เช่น
In this article, I use the Display Message action to show the values in each Excel cell to show how the robot works.
Therefore, you just change from the Dispaly Message action to the action you want, such as
- If you want to type values in the window application, use the Populate text field in window action.
- If you want to type values in the website, use the Populate text field on web page action.
- If you want to use the value as the subject mail in Outlook, put it in the parameter “Subject” in Send email message through Outlook.
- etc.
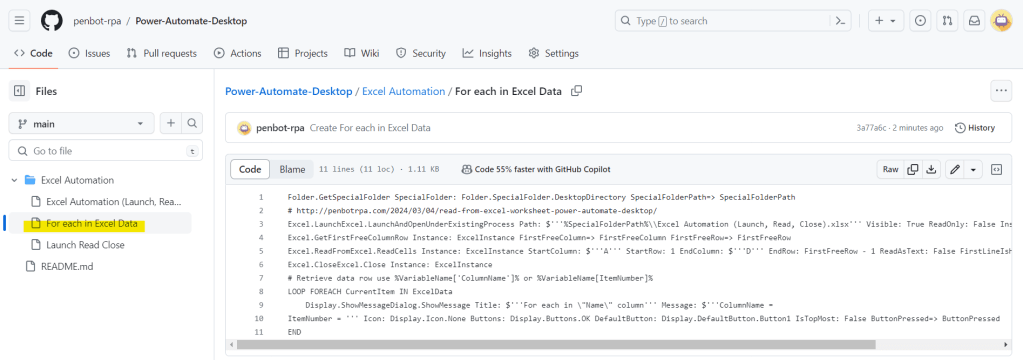
For anyone who wants to see the Power Automate Desktop code in this article, you can copy the code on github and paste it into the Workspace of Power Automate Desktop, but you’ll have to make some adjustments by yourself. (Try reading and reviewing this article again. You can definitely do it. ❤️🔥)
You can download Excel file for this article here.
Hope this article will be useful to the people who just starting to study Power Automate Desktop, if you have any questions about this article, you can comment and ask section below.
Don’t forget to press like, share, subscribe for good articles from now on (press the subscribe button and you will receive a mail confirming your subscription to confirm again as well).
Until we meet again, Happy Automating!! 😁

Leave a comment